Shrinkin’ & Dinkin’
Are you Ruff? Are you Ready?
Just want to write a quick post to record progress on my lifelong journey to make Shrinky Dinks into legitimate items. I remember being pretty sad (read: distressed & destroyed) when I came to believe that Dinks were too thin and vulnerable to actually be used for keychains, jewelry, or magnets - how could something so cool and terrifying in its ability to shrink be so ill-suited to stand the tests of time and daily use?
Social media, the true hero of more than one of my blog posts, saved the proverbial day/decade of yearning for SD self-actualization once again, this time by providing me with a lifetime’s worth of videos of professional Dink Shrinkers doing their thing. Here are three things I learned:
ONE: You can use a heat gun to shrink dinks, and if it’s hot enough, it takes less than 30 seconds. This is a big plus for me as I like to spend as little possible time in and around the kitchen - not having to wait for an oven to preheat is reason enough alone for a new approach. I’m still figuring out the best surface to use as I blast my dinx with my hot gun, and regretfully for me after I came in hot with my anti-kitchen commentary, I believe the best answer so far has been to hot-gun them on a baking sheet on top of the stove. The empty ring of a packing tape roll seems to be the item of choice to keep your dink from being blown away. This was a success for me, however there was a bit more tape on the roll than I thought and I am pretty sure it’s all melted together now.
Here’s another approach that looks pretty good - if you fast forward to the climax of the dinking, we see that this person uses a little stick to hold the dink down on a ceramic plate.
Can ceramic plates handle heat well? I once shattered a beautiful, thick glass bowl within three weeks of receiving it as a wedding gift because I didn’t realize putting it over a pot of boiling water to melt something (chocolate? Wax? I dishonor the memory of this bowl with my forgetfulness) would overheat and crack that bowl like an ice cube. So, my confidence on this subject is low, but I’ll try it out.
TWO: (backtracking process-wise): Chalk pastels, or I guess “soft” pastels - basically, not the oil ones - can give really nice, smooth, transparent color. I tried this out with this keychain that I made for Matt, featuring one of his favorite little drawings. I used a turquoise pastel and it adhered so nicely to the hilariously named Ruff N’ Ready textured side of the dink paper. It came out vibrantly and transparent at the same time - I love it and will probably use it again. My attempts to use colored pencils have turned out muted and dingy looking - and I sometimes over-apply Posca pens to fill in an area. The black outline on this one is done with Posca pen, by the way, and I think it came out very clearly. A+!
THREE: UV Resin top coat! It looks like glass! It’ll change your life! It protects the paint and drawing etc! It’s impossible to stop touching its smoothness!
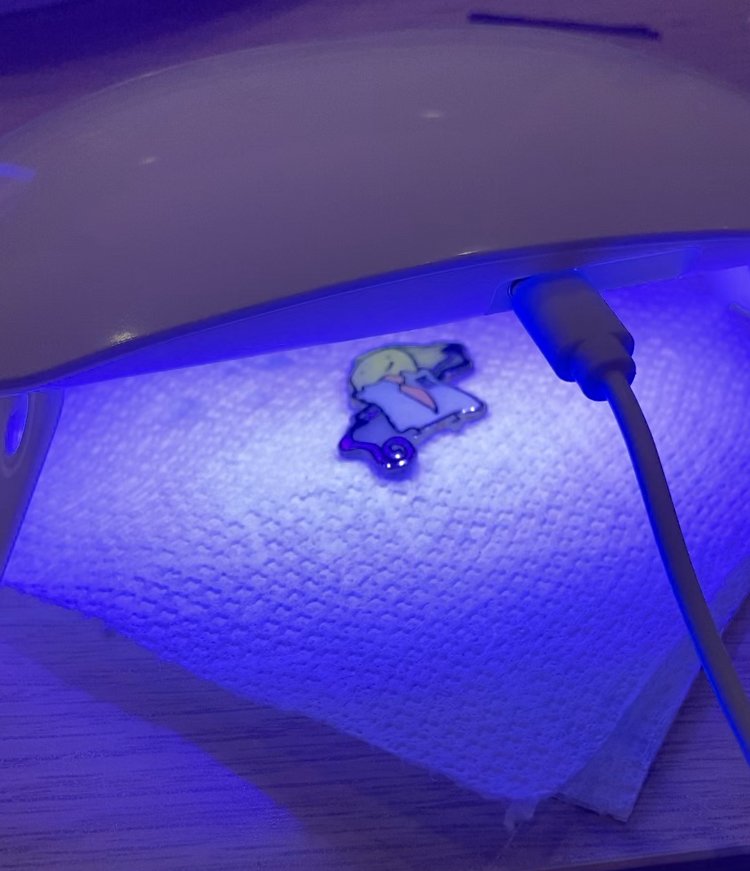
I’ve been excited about this since I first used it last Friday. Basically, you just create and shrink your dink, and once it’s all flattened and ready to go (ruffness optional at this point), you pour a little bit of UV resin on the top until the whole surface is covered, run a lighter or heat gun over the top for a few seconds to coax out the bubbles, and place it under a UV lamp for 5 minutes or so. VOILA a crystal clear, smooth, glass-like bubble coating your project. I did it on the front and back of Matt’s keychain so it had a full bubble appearance, and it looks so good.
I just did the front of this little guy that Matt drew for me. He colored it in with Posca pens and I think the colors came out really well. I accidentally chopped its head off when I tried to drill a little hole in for a chain. Now, it adorns my computer monitor and I love it.
I got my UV resin and light on Amazon - I think it was one of the first few when I searched, and it was on some random sale. It’s like the kind people use for nails, I think. I’ve used “AB” type resin before - where you mix solution A with solution B and then set it out to cure for 24+ hours. I’ve had mixed success with it - very sticky and messy to work with, and kind of difficult to know if I got the right ratio of A to B (some of my products turned out squishy like unchewed gum and that was a drag. So, so far, I like this kind better. Here’s a pic of that little egg man going through “the change.”
Here’s a little tiny SD keychain thing I made as I was experimenting. It’s the one that looks like a little water drop. It’s a symbol that Matt drew maybe six or seven years ago - it represents us and our love hehe (we got matching tattoos of it last year on our first anniversary :D). I took a little vid of it so you can hopefully see how round and glossy it is. I used a Posca pen to draw it.
That’s all for now - it’s a school night! I’ve got some more experiments I want to try out with the SDs - I’ve seen some wild applications of solder as a charm border for dinx. The future is shrunken!


